Deploy a Public Server
Using RainYun Cloud App
Section titled “Using RainYun Cloud App”In this section, we will use RainYun Cloud App as an example to demonstrate how to deploy a public server.
-
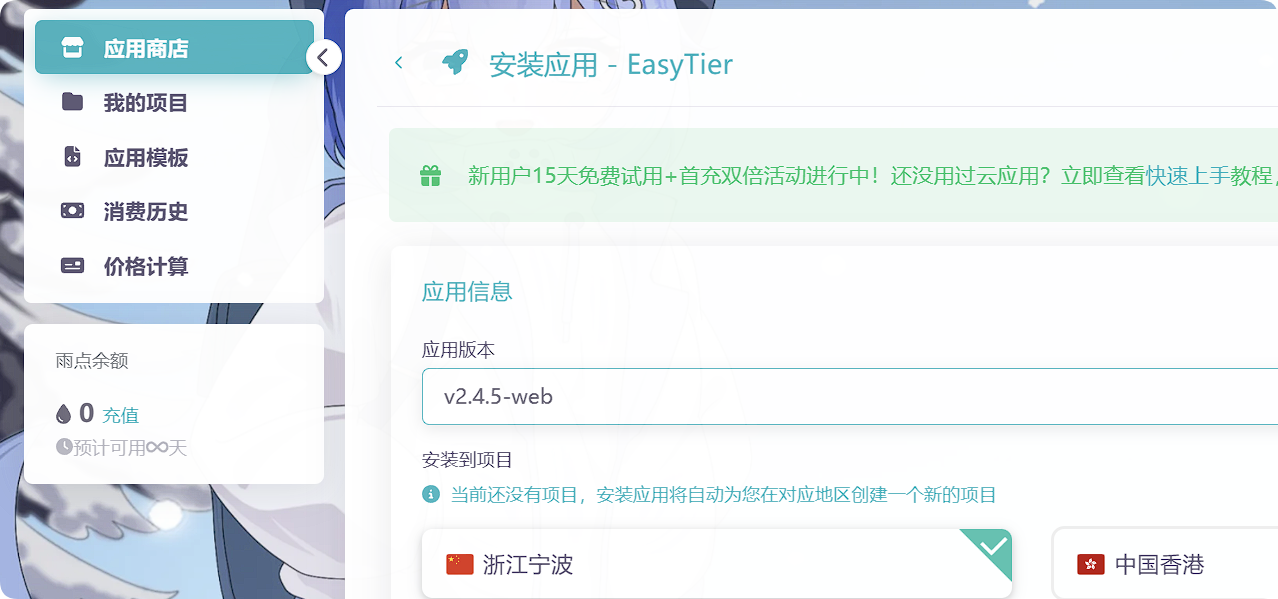
Log in to the RainYun Cloud App console, click Create App, find the EasyTier app in the App Store, click Deploy, select the latest web version, adjust other options as needed (defaults are generally fine).
-
Wait for the installation to complete, then enter the app’s console.
-
In the console terminal, enter the EasyTier startup command and parameters to start the node.
When acting as a public node, you can start without parameters (default listening on port 11010). To specify protocols and ports, use:
# Multiple ports or protocols require separate specificationseasytier-core --listeners tcp://0.0.0.0:11010 --listeners xxxxxxIf you want the server to only help establish P2P connections without forwarding data, enable relay RPC and network whitelist. To forward traffic for specific networks, append the corresponding network name after the whitelist:
easytier-core --relay-all-peer-rpc --relay-network-whitelist xxxxxx- Based on the ports and protocols you opened, add the corresponding entries in the Services section.
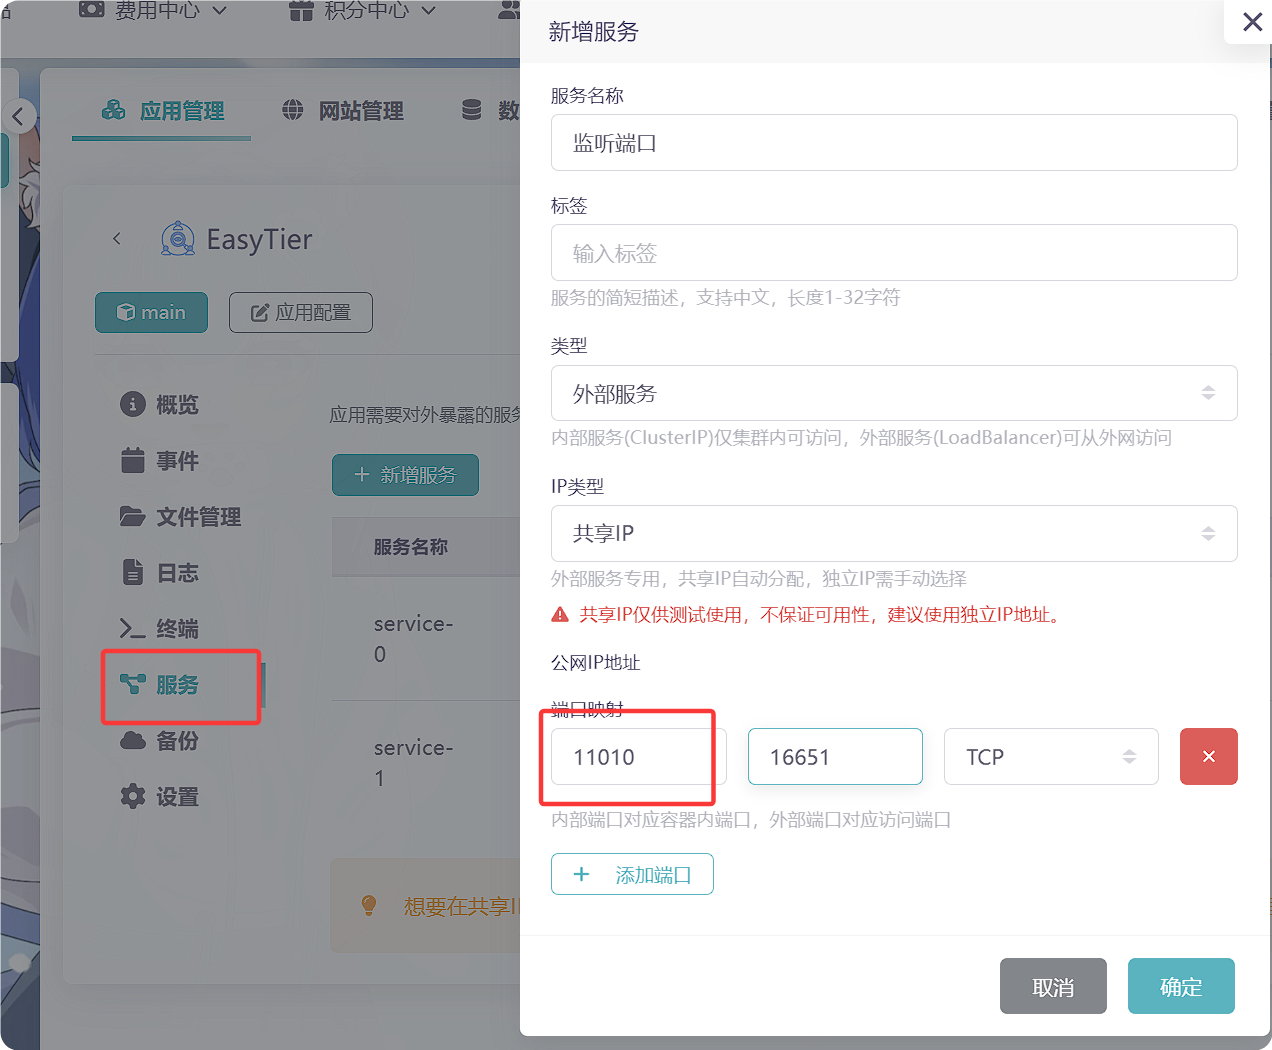
Others can connect to your server node using the corresponding IP address and port.
- Optional: Add a scheduled task.
While the above method works for running the node, manually repeating the steps after each restart can be tedious. You can add a scheduled task to auto-start the node.
- On the instance’s Scheduled Tasks page, click Add. Name the task as you like and set the interval to about 30 minutes or 1 hour.

- Set the task type to Shell, select EasyTier as the application, and enter the following script:
#!/bin/bashPROCESS_NAME="easytier-core"# Full command to execute (replace with your actual command)FULL_COMMAND="easytier-core --listeners tcp://0.0.0.0:11010 --relay-all-peer-rpc --relay-network-whitelist xxxxxx......"
if pgrep -x "$PROCESS_NAME" > /dev/nullthen    echo "$(date): $PROCESS_NAME is running, no action needed"else    echo "$(date): $PROCESS_NAME is not running, starting..."    nohup $FULL_COMMAND > /dev/null 2>&1 &
    sleep 3    if pgrep -x "$PROCESS_NAME" > /dev/null    then        echo "$(date): $PROCESS_NAME started successfully"    else        echo "$(date): $PROCESS_NAME failed to start"        exit 1    fifi
exit 0At this point, the public server node has been deployed successfully.
Deploying with Docker (Zeabur & Claw)
Section titled “Deploying with Docker (Zeabur & Claw)”- Zeabur: https://zeabur.cn
- Claw: https://ap-northeast-1.run.claw.cloud
Prerequisite: you have a GitHub account that is at least 180 days old, qualifying you for $5 monthly credit on these container platforms. This is sufficient for running an EasyTier node that does not forward traffic. Forwarding traffic consumes too much for the $5 budget — it’s only recommended for handshake and P2P connections. NAT4 web hosting speeds are not great.
Deploying on Zeabur
Section titled “Deploying on Zeabur”-
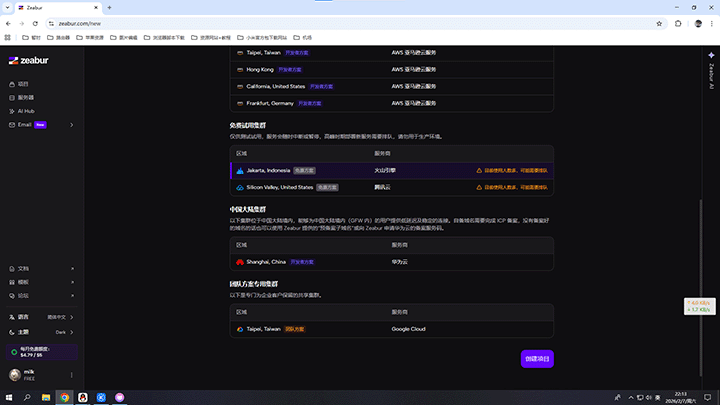
Click “Create Project.”

-
Choose a free trial cluster. Select Tencent — latency is around 100–300ms — then create the project.
-
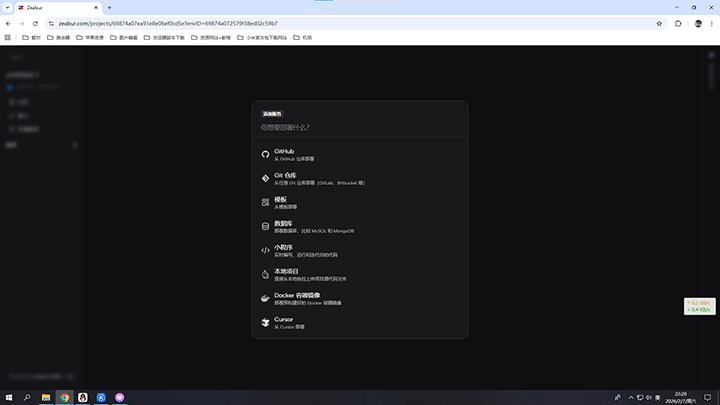
Click “Deploy New Service,” then select Docker Container Image.
-
Configure the relevant options:
- Docker image:
easytier/easytier - Port: the port you want to expose
- Startup command: refer to the earlier section
- Docker image:
From the official documentation:
If you want EasyTier to only serve within your virtual network and prevent nodes from other virtual networks from connecting to your node, use the --private-mode true parameter when starting EasyTier.
This will only allow nodes with network name my-network and key my-secret to connect to this EasyTier node.
For other startup parameters, check the official documentation and adjust as needed.
If startup is successful, you will see something like:
tcp://sjc1.clusters.zeabur.com:33332
A link similar to this will appear — enter it in EasyTier’s node field to use.
Deploying EasyTier Node on Claw
Section titled “Deploying EasyTier Node on Claw”Open the website: https://ap-northeast-1.run.claw.cloud Log in with GitHub.
Open App Launchpad.
- Click “Create App”
- Application Name: choose any name you like
- Image: use the official Docker image
easytier/easytier - Usage: set CPU frequency and memory. 0.1 CPU and 64 MB memory is sufficient if not forwarding traffic; adjust based on actual needs.
- Network: configure ports and domains; you can add your own domain.

Note: under Claw’s free plan, only one TCP/UDP port can be opened; HTTPS, gRPC, and WSS protocols have no such restriction.
- Advanced Configuration
- Command: enter the startup command
Terminal window easytier-core --xxxxxx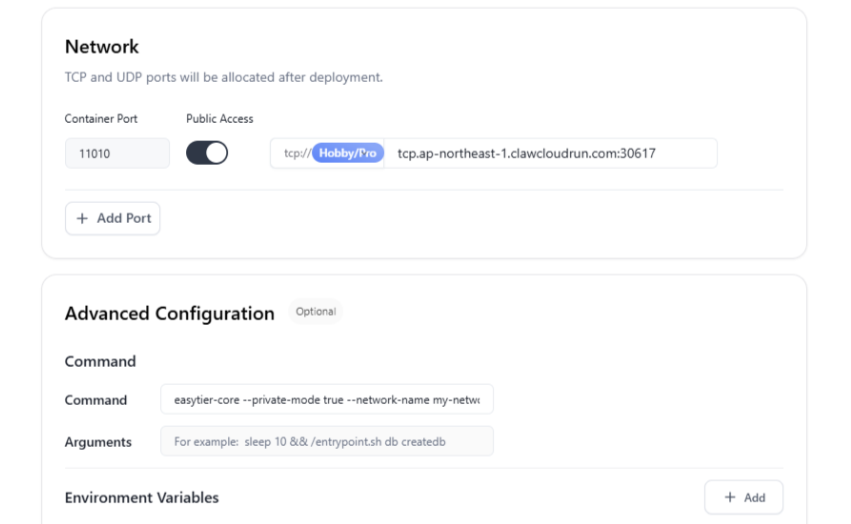
Click “Deploy Application” to create the container. If startup fails, it’s likely because the image wasn’t pulled — a common Claw issue. There’s no fix; try switching regions. The three free regions are Singapore, US, and Japan.
On success, you will see a link like:
tcp://tcp.ap-northeast-1.clawcloudrun.com:30655
Enter this in the server field to use it.