NAT Traversal Server Deployment
NAT Traversal
Section titled “NAT Traversal”NAT traversal refers to mapping certain ports of a server located in an internal network onto the public Internet through technical means, allowing public network clients to access the internal server.
Currently common technologies include Frp, Ngrok, etc. They work by setting up a proxy service on a public server to forward traffic to the internal server, achieving NAT traversal. Of course, if your NAT type is NAT1 (Full Cone NAT), you can use the STUN protocol for NAT traversal.
Below, we introduce the setup process for both techniques. The proxy server uses SakuraFrp as an example, and STUN traversal uses Lucky as an example.
Setting Up a Server Node with Frp
Section titled “Setting Up a Server Node with Frp”Starting QtEasyTier
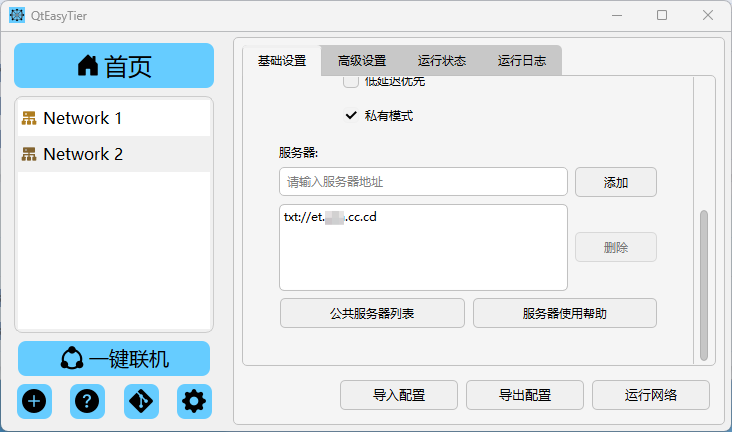
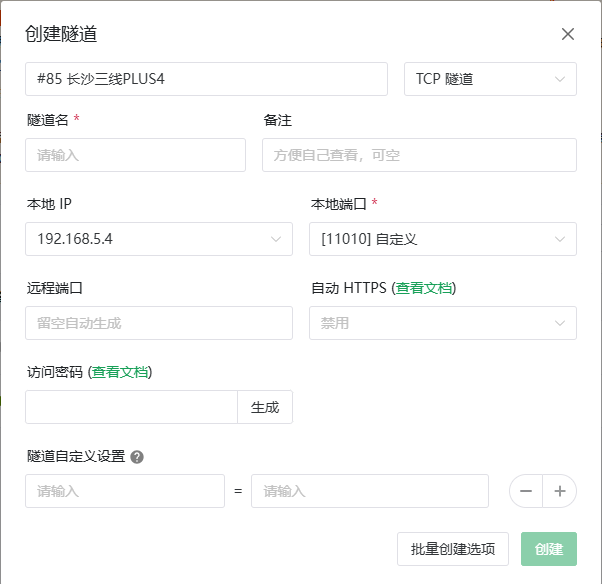
Section titled “Starting QtEasyTier”- Configure the server-side network parameters as needed.
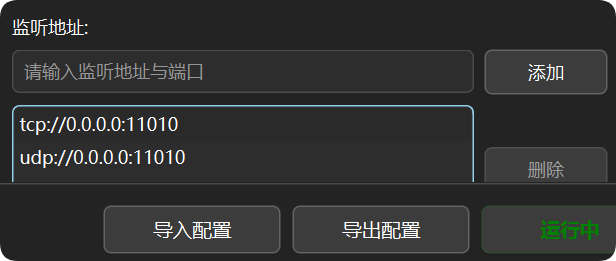
- Set the listening port as desired; here we use the default TCP port 11010 as an example.
- Click “Run Network.”
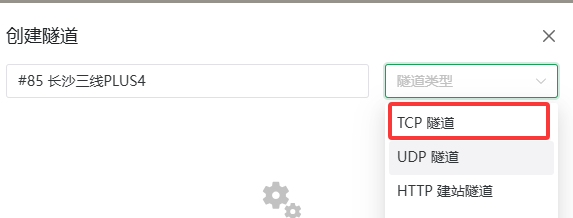
Creating an FRP Tunnel
Section titled “Creating an FRP Tunnel”- Open the FRP website — Register — Log in — Complete identity verification.
- Check the status of available FRP nodes.
- Create an FRP tunnel. Due to ISP QoS and node settings, TCP tunnels are recommended as the first choice.
- Change the local IP to a LAN IP (loopback addresses like 127.0.0.1 will prevent the virtual network from connecting).
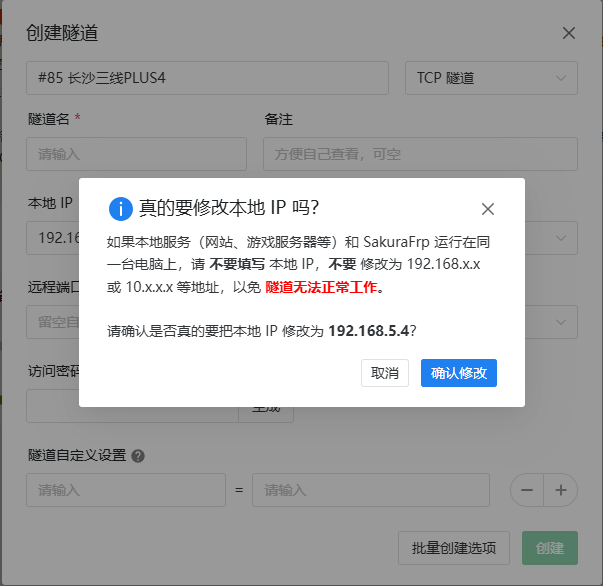
- Change the local port to the listening port you configured in QtEasyTier (default 11010).
Node Selection Tips
Section titled “Node Selection Tips”When choosing a relay node, consider the following in order of priority:
- Prefer multi-line / tri-line nodes in the same province.
- If no same-province node is available, prefer physically closer multi-line / tri-line nodes.
- If no multi-line / tri-line nodes are available, prefer nodes of the same ISP and avoid cross-ISP access as much as possible. On this basis, choose a node that is physically closer.
- When no other options exist, choose a node physically closest to you.
- Specifically, for China Broadcom (广电) users without multi-line / tri-line options, try China Mobile or China Unicom nodes.
Starting the FRP Tunnel
Section titled “Starting the FRP Tunnel”- Download the appropriate third-party launcher or frpc for your device.

- Configure the launcher (follow the guided setup; not detailed here).
- Start the tunnel.
- Check the FRP logs to obtain the FRP relay address and port.

- When forming a virtual network, enter the FRP relay address and port in the server field.
Setting Up a Server Node with STUN
Section titled “Setting Up a Server Node with STUN”This section is based on Lucky or other STUN NAT traversal software. Lucky is used as the example below.
Feature Overview
Section titled “Feature Overview”STUN (Session Traversal Utilities for NAT) NAT traversal technology helps solve network connection problems caused by NAT technology. STUN allows NAT1 users to obtain a public port and expose internal service ports to the external network through router port forwarding or Lucky’s built-in forwarding, achieving NAT traversal.
Before You Begin
Section titled “Before You Begin”The port penetration provided by the STUN feature is for trial use only, and the frequency of port changes cannot be guaranteed. Please note that no technical support is provided for STUN stability-related issues. Likewise, we do not offer any solutions for accessing internal networks without a public IPv4 address.
For basic STUN NAT traversal usage, see STUN NAT Traversal.
Implementation Steps
Section titled “Implementation Steps”The server startup method is the same as before and will not be repeated.
-
Check your NAT type.
-
Configure DMZ or UPnP.
-
Create a penetration port. (1) TCP Penetration Under
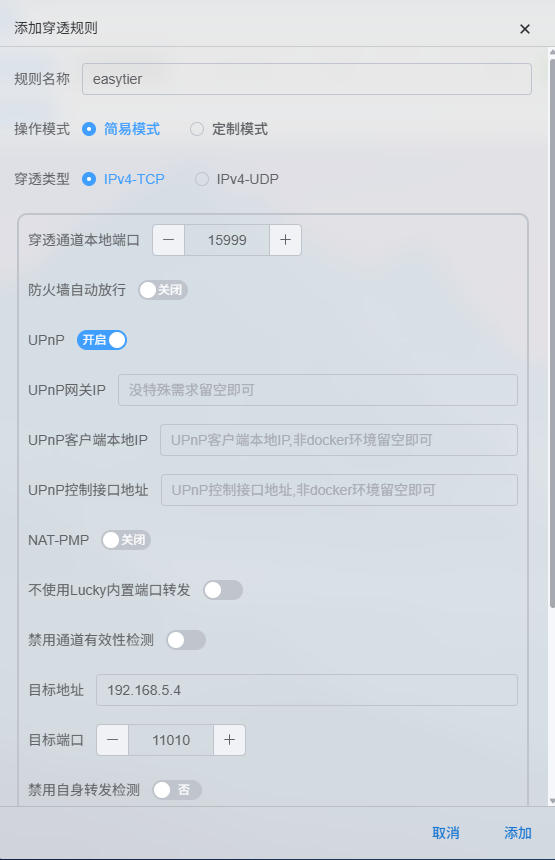
Lucky -> NAT Traversal -> STUN NAT Traversal, create a new penetration rule. Set the penetration protocol to IPv4-TCP.- The penetration channel local port can be 0 (random port) or a manually specified unused port above 10240 (recommended).
- The target address should be the device’s IP address (must not be within 127.0.0.0/8).
- The target port is the corresponding EasyTier listening port.
 (2) UDP Penetration
 - UDP penetration is the same as TCP, except the penetration type is changed to UDP. (3) Manual Configuration
- Instead of using Lucky’s built-in port forwarding, manually open the corresponding firewall and port forwarding rules for higher forwarding efficiency.
-
Successful STUN NAT Traversal

-
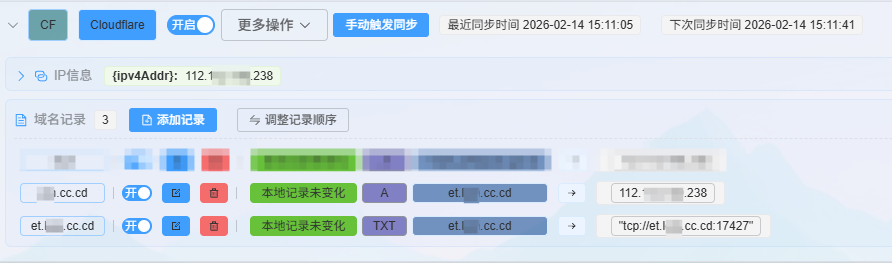
Fixing the STUN penetration port EasyTier supports obtaining links via DNS TXT records, SRV records, and HTTP(s) requests to retrieve the peer device’s IP + port. Therefore, we can use
Lucky -> Dynamic DNSto create corresponding resolution records orLucky -> Web Serviceto achieve dynamic address resolution. (1) TXT Record UnderLucky -> Dynamic DNS -> Add DDNS Record, add a TXT record. Set the record name to the domain to be updated, record type to TXT, and record content to Lucky’s global variabletcp://{STUN_RuleName_ADDR}.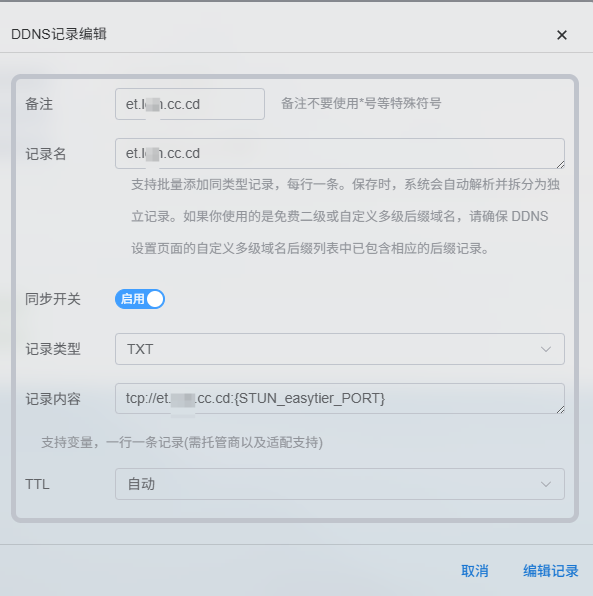
 (2) SRV Record
Configuration and flexibility are lower than TXT, so we will not expand on how to implement this here. If needed, refer to ie-12’s tutorial.
(3) HTTP Record
The advantage of HTTP over DNS TXT records is that dynamically changing ports can be resolved in real time without lag caused by DNS caching. However, the prerequisite is setting up a Web reverse proxy and STUN penetration.
(2) SRV Record
Configuration and flexibility are lower than TXT, so we will not expand on how to implement this here. If needed, refer to ie-12’s tutorial.
(3) HTTP Record
The advantage of HTTP over DNS TXT records is that dynamically changing ports can be resolved in real time without lag caused by DNS caching. However, the prerequisite is setting up a Web reverse proxy and STUN penetration.Under
Lucky -> Web Service -> Add Sub Rule, create a site. Set the service type to Text Output and the frontend address to your domain resolution address. This address can be the same as your TXT record, since one is an A/AAAA record and the other is a TXT record — they do not conflict.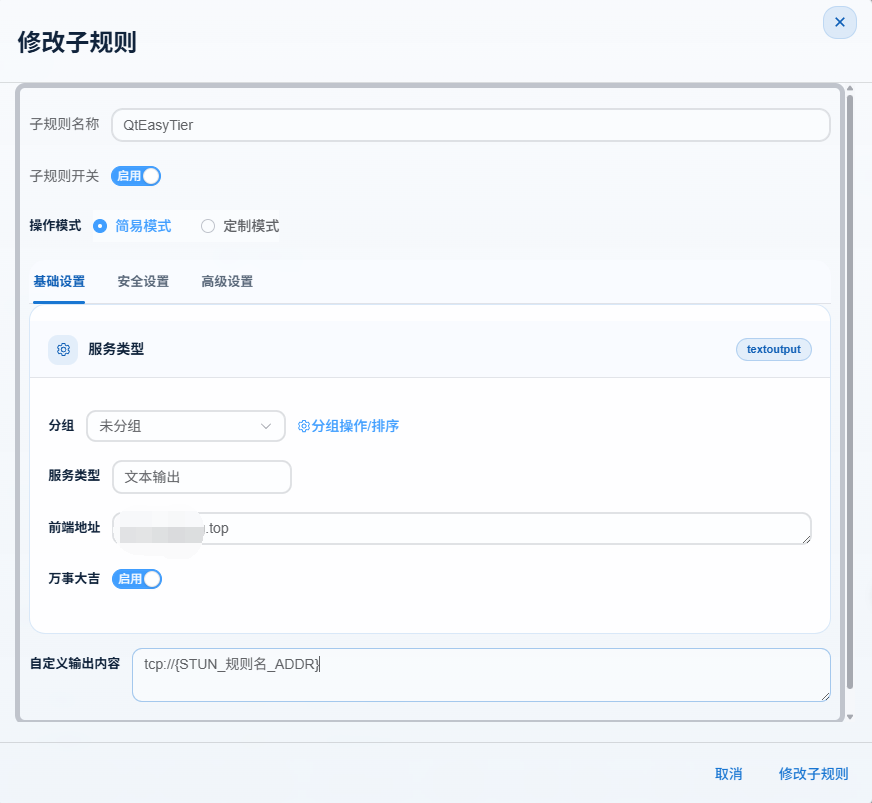
Connecting to the Server
Section titled “Connecting to the Server”- Enter the STUN penetration address and port in the server field.
- Or enter the TXT record in the server field.
- Start the virtual network.